Import Collar Data
This step by step guide will help you download collar data from IDAQ and import it correctly into Movebank.
In this guide:
Download data file from IDAQ
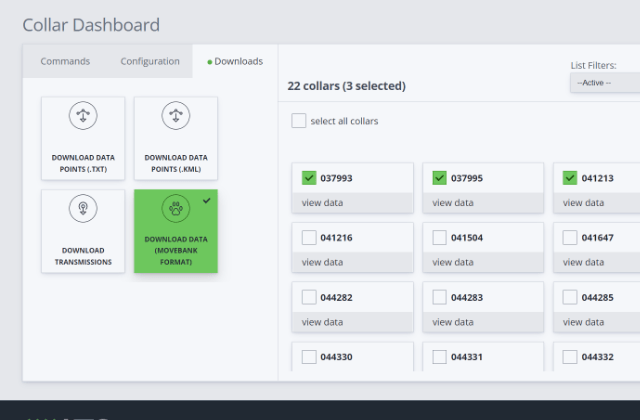
Head over to the IDAQ website and login to your account. Navigate to the collar dashboard and select the collars you want to download data from. Then open the downloads tab and select the “download data (movebank format)” option. Click through the rest of download process until your file is downloaded.
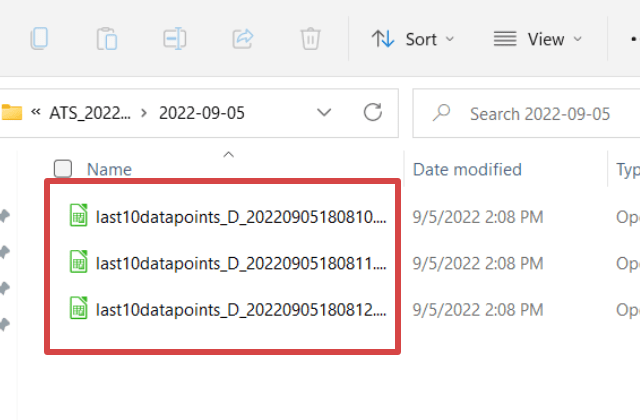
The resulting file will be a zipped folder containing CSV files, one for each collar you selected.
Upload data file to Movebank
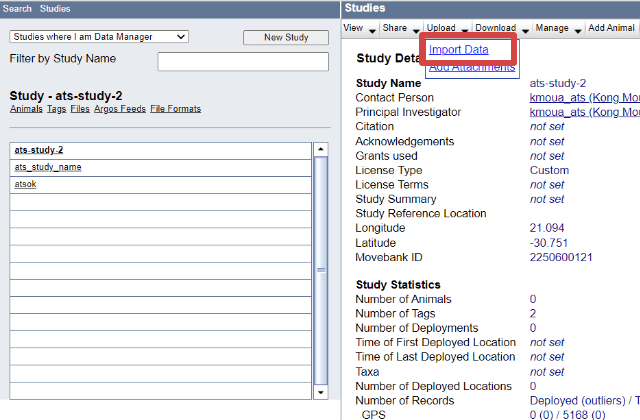
After logging into your Movebank account head over to the studies page and select the study you want to import data into. Select the Upload dropdown and click the “Import Data” link.
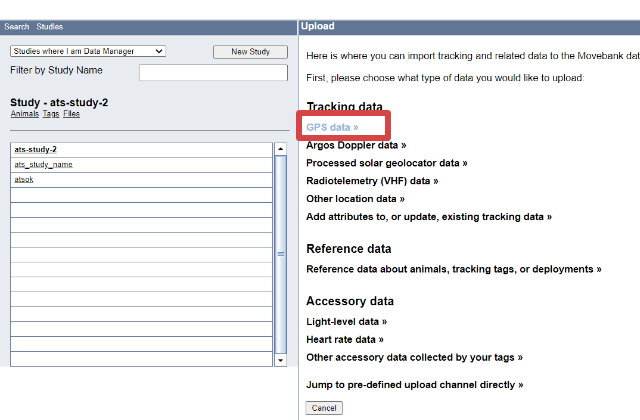
Click the “GPS data” link as the data type to upload.
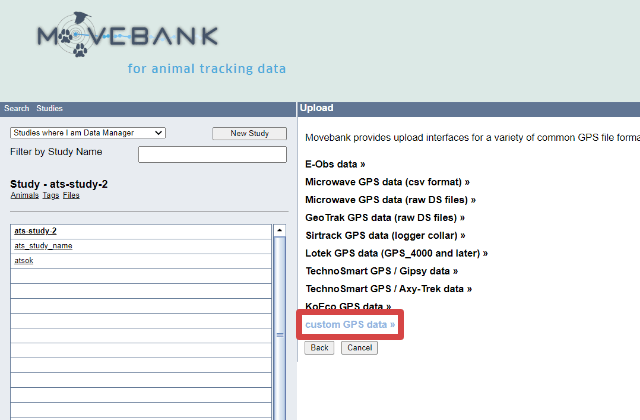
Amongst the GPS file formats click the “custom GPS data” link.

Click the choose file button and you will be prompted to choose a file from your local system. Navigate to the CSV files downloaded from the IDAQ website and select one to upload.
Mapping File Data
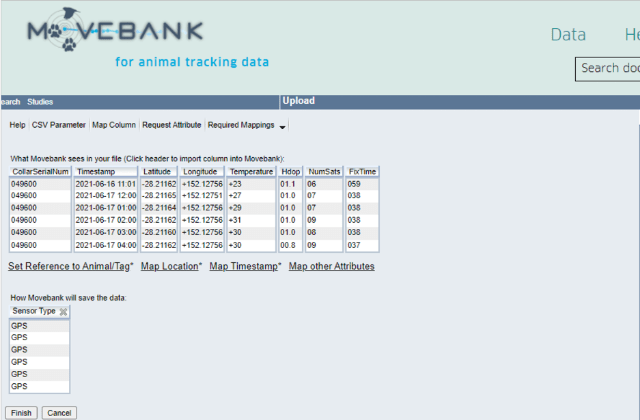
Due to the file being uploaded with the custom GPS format option. Some data mapping is required before the import can be completed.
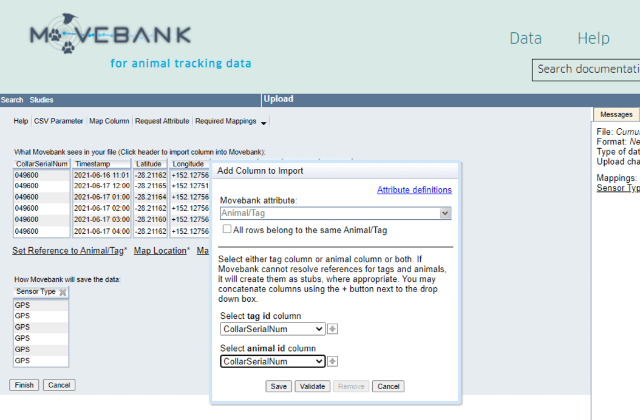
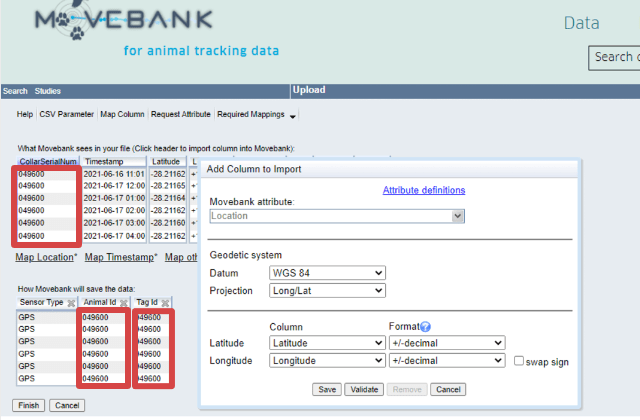
Underneath the contents of our data file are a group of links showing Movebank attributes that require mapping. Start by clicking the “animal/tag” option. In the resulting pop up select the “CollarSerialNum” as the column for both “tag id” and “animal id”. Click the “Save” button to apply.
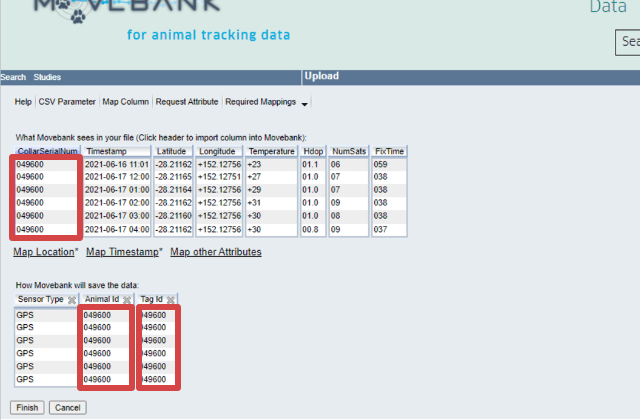
You should see the “Animal id” and “Tag id” columns added at the bottom. They should match the “CollarSerialNum” column above.
Next step is to map the location data. Click the “Map Location” link. If the latitude and longitude rows are already set with the latitude and longitude columns from our file then all you need to do is click “Save”.
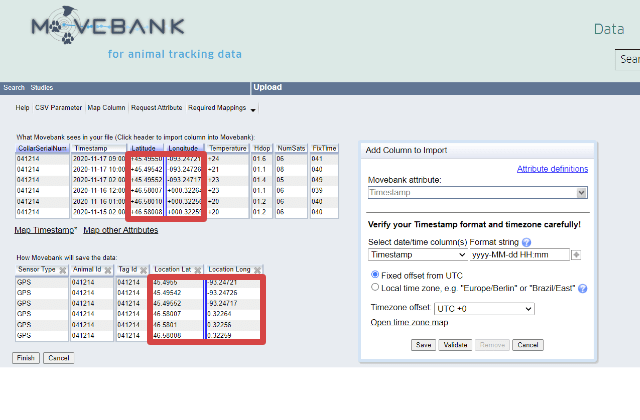
Finally, you must map the timestamp column. Click the “Map Timestamp” link to open the column pop up. Once again, if the Timestamp column is already set correctly and in the correct format you need only click “Save”.
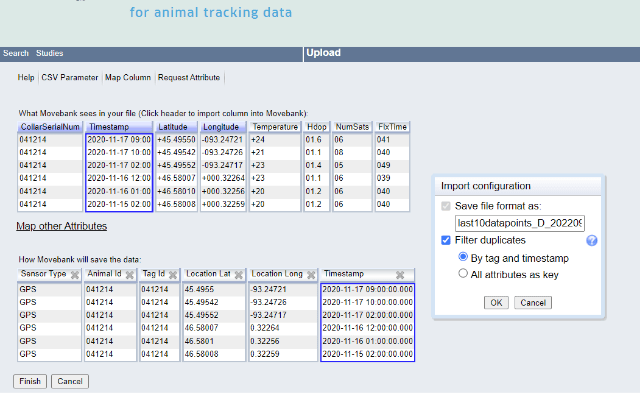
Once all the columns have been mapped correctly the screen should resemble the one above. Click “finish” and then “OK” to finalize the import.